The exhibit
At the beginning of last year (2015), there was a grand neuroscience exhibition at the Exploratorium. People could see how their brainwaves and heart rate change as they meditate, experience a virtual reality that adapts to their brain, learn about the latest fMRI research, control a robot arm with their mind, among other things.
I was part of the team responsible for the mind-controlled robotic arm. It was a great experience. The Make magazine even wrote about us!
I'll present this here, in this way overdue post. Basically, it went like this…
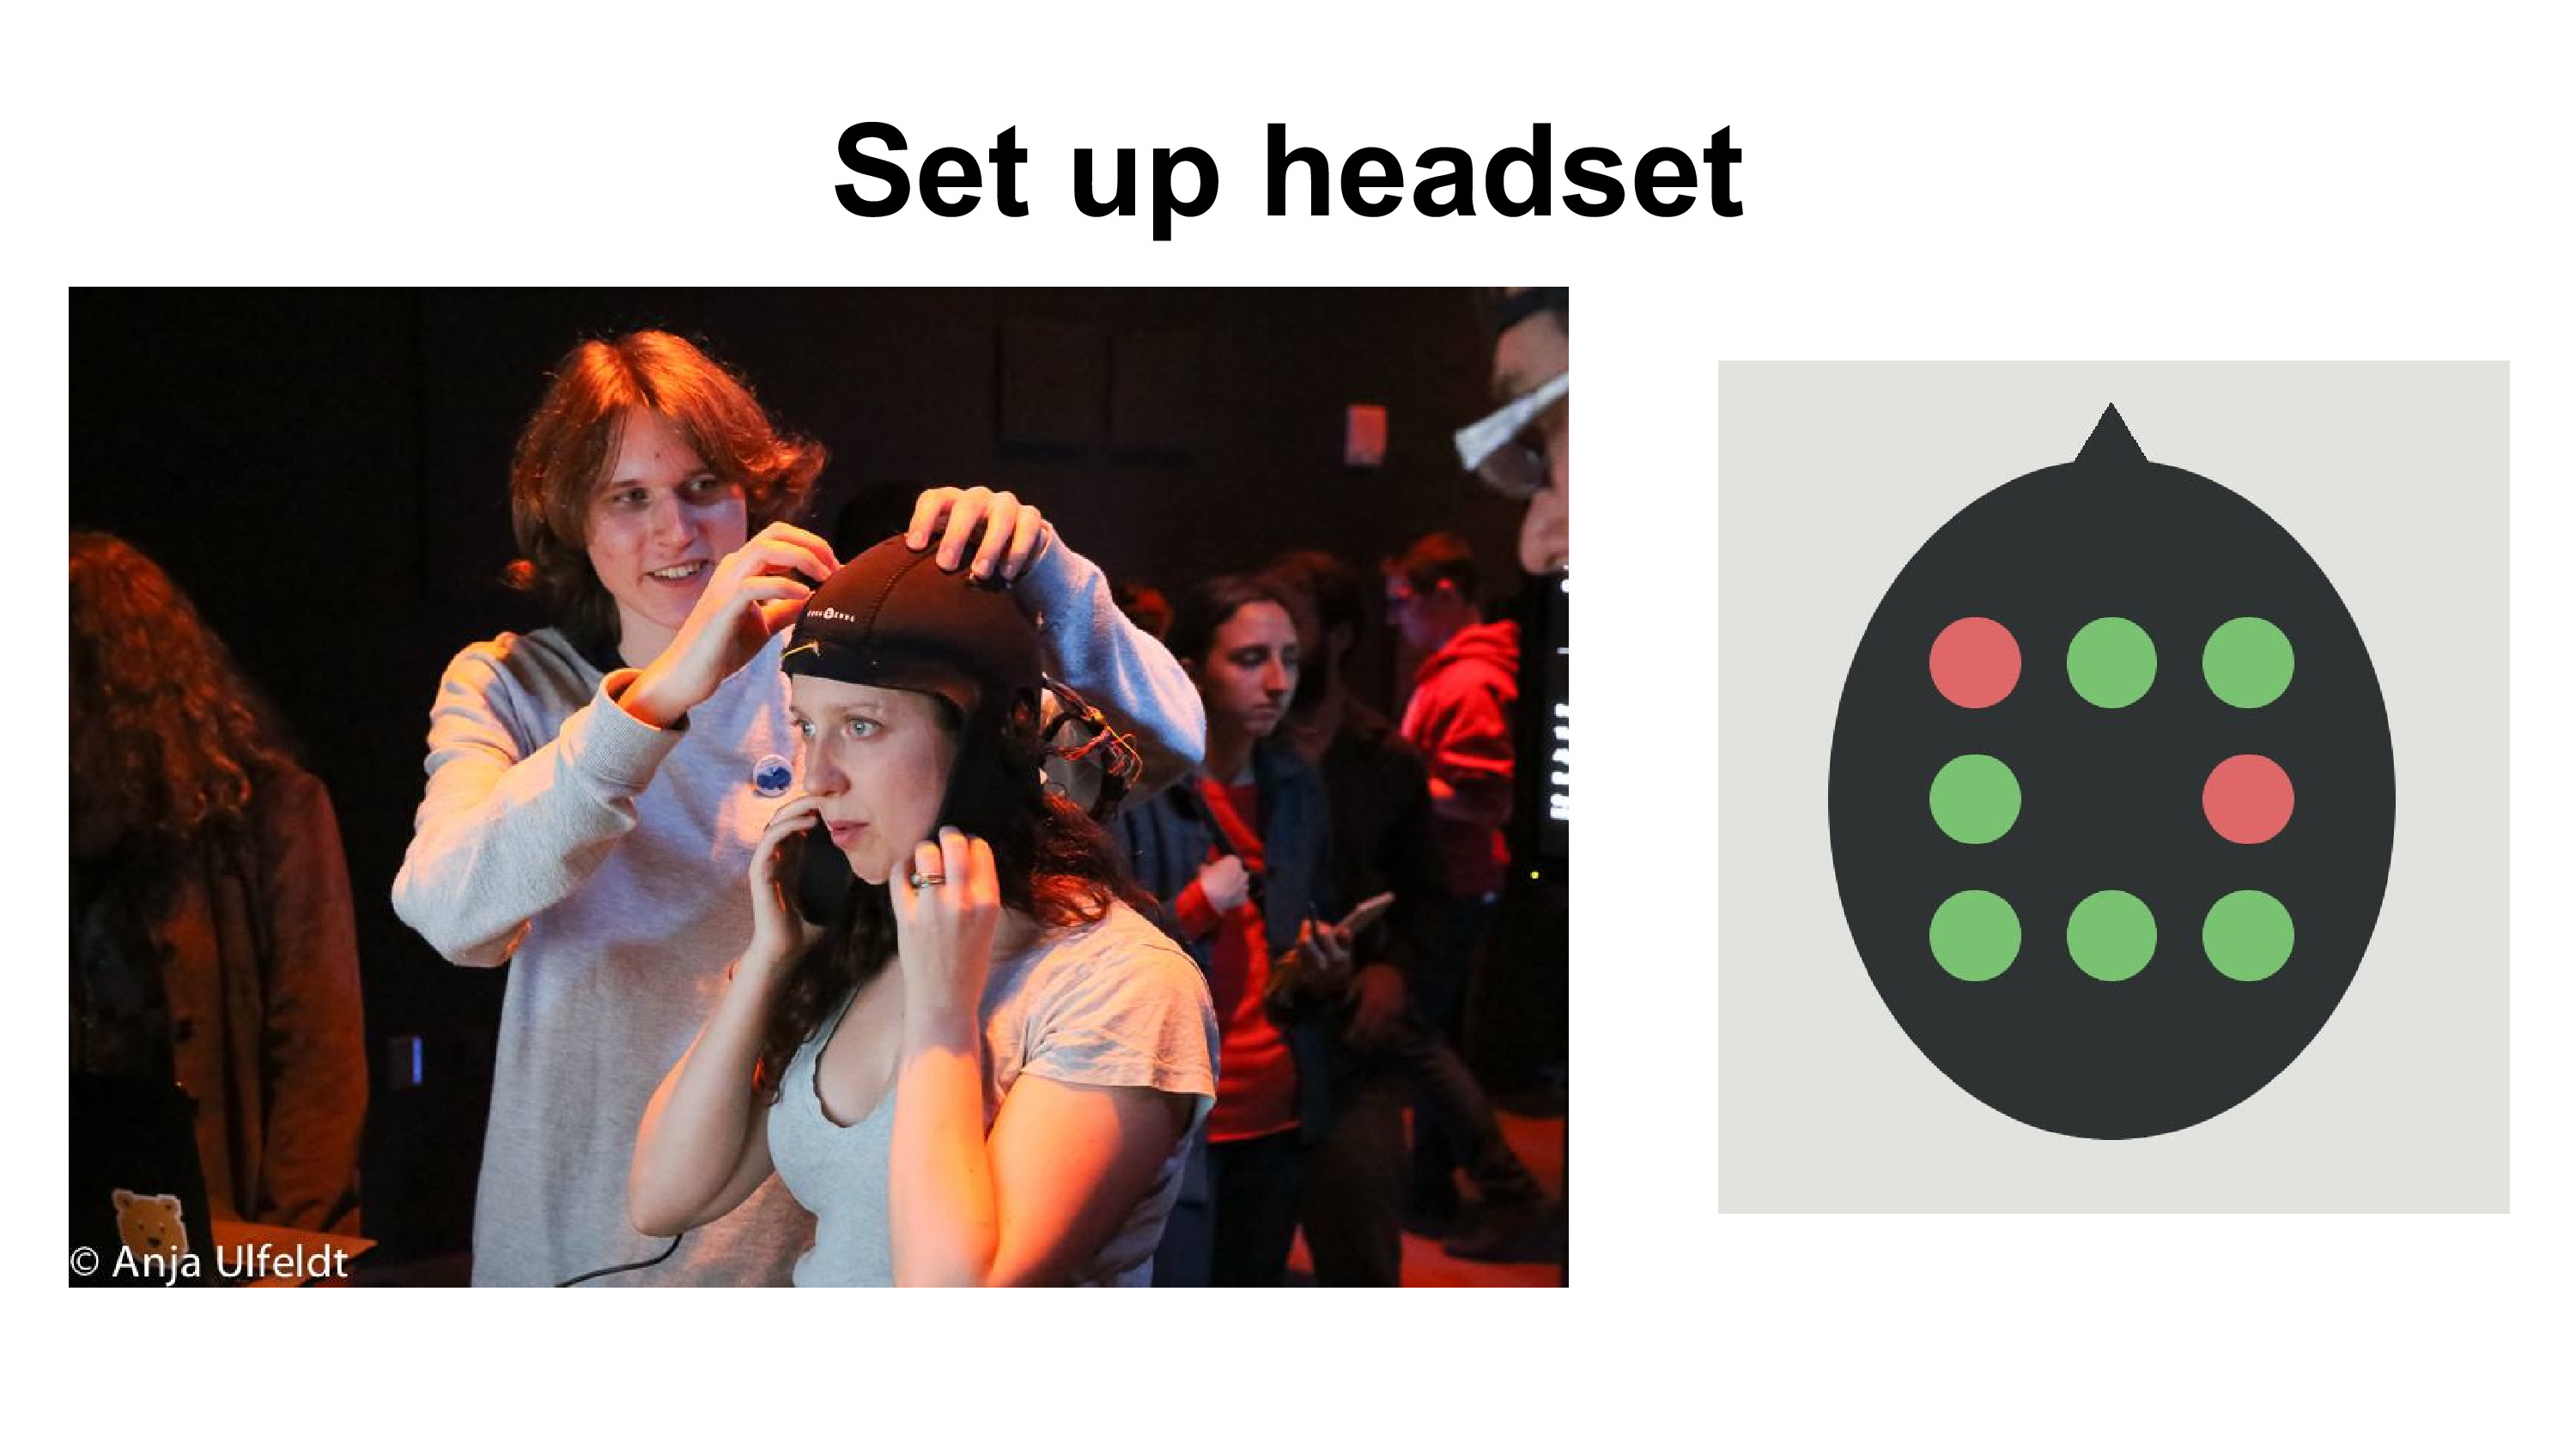
First, we setup the headset. The electrodes had to be pointing down, and all touching the scalp. We looked at our own display of signal quality to check whether they were placed properly.
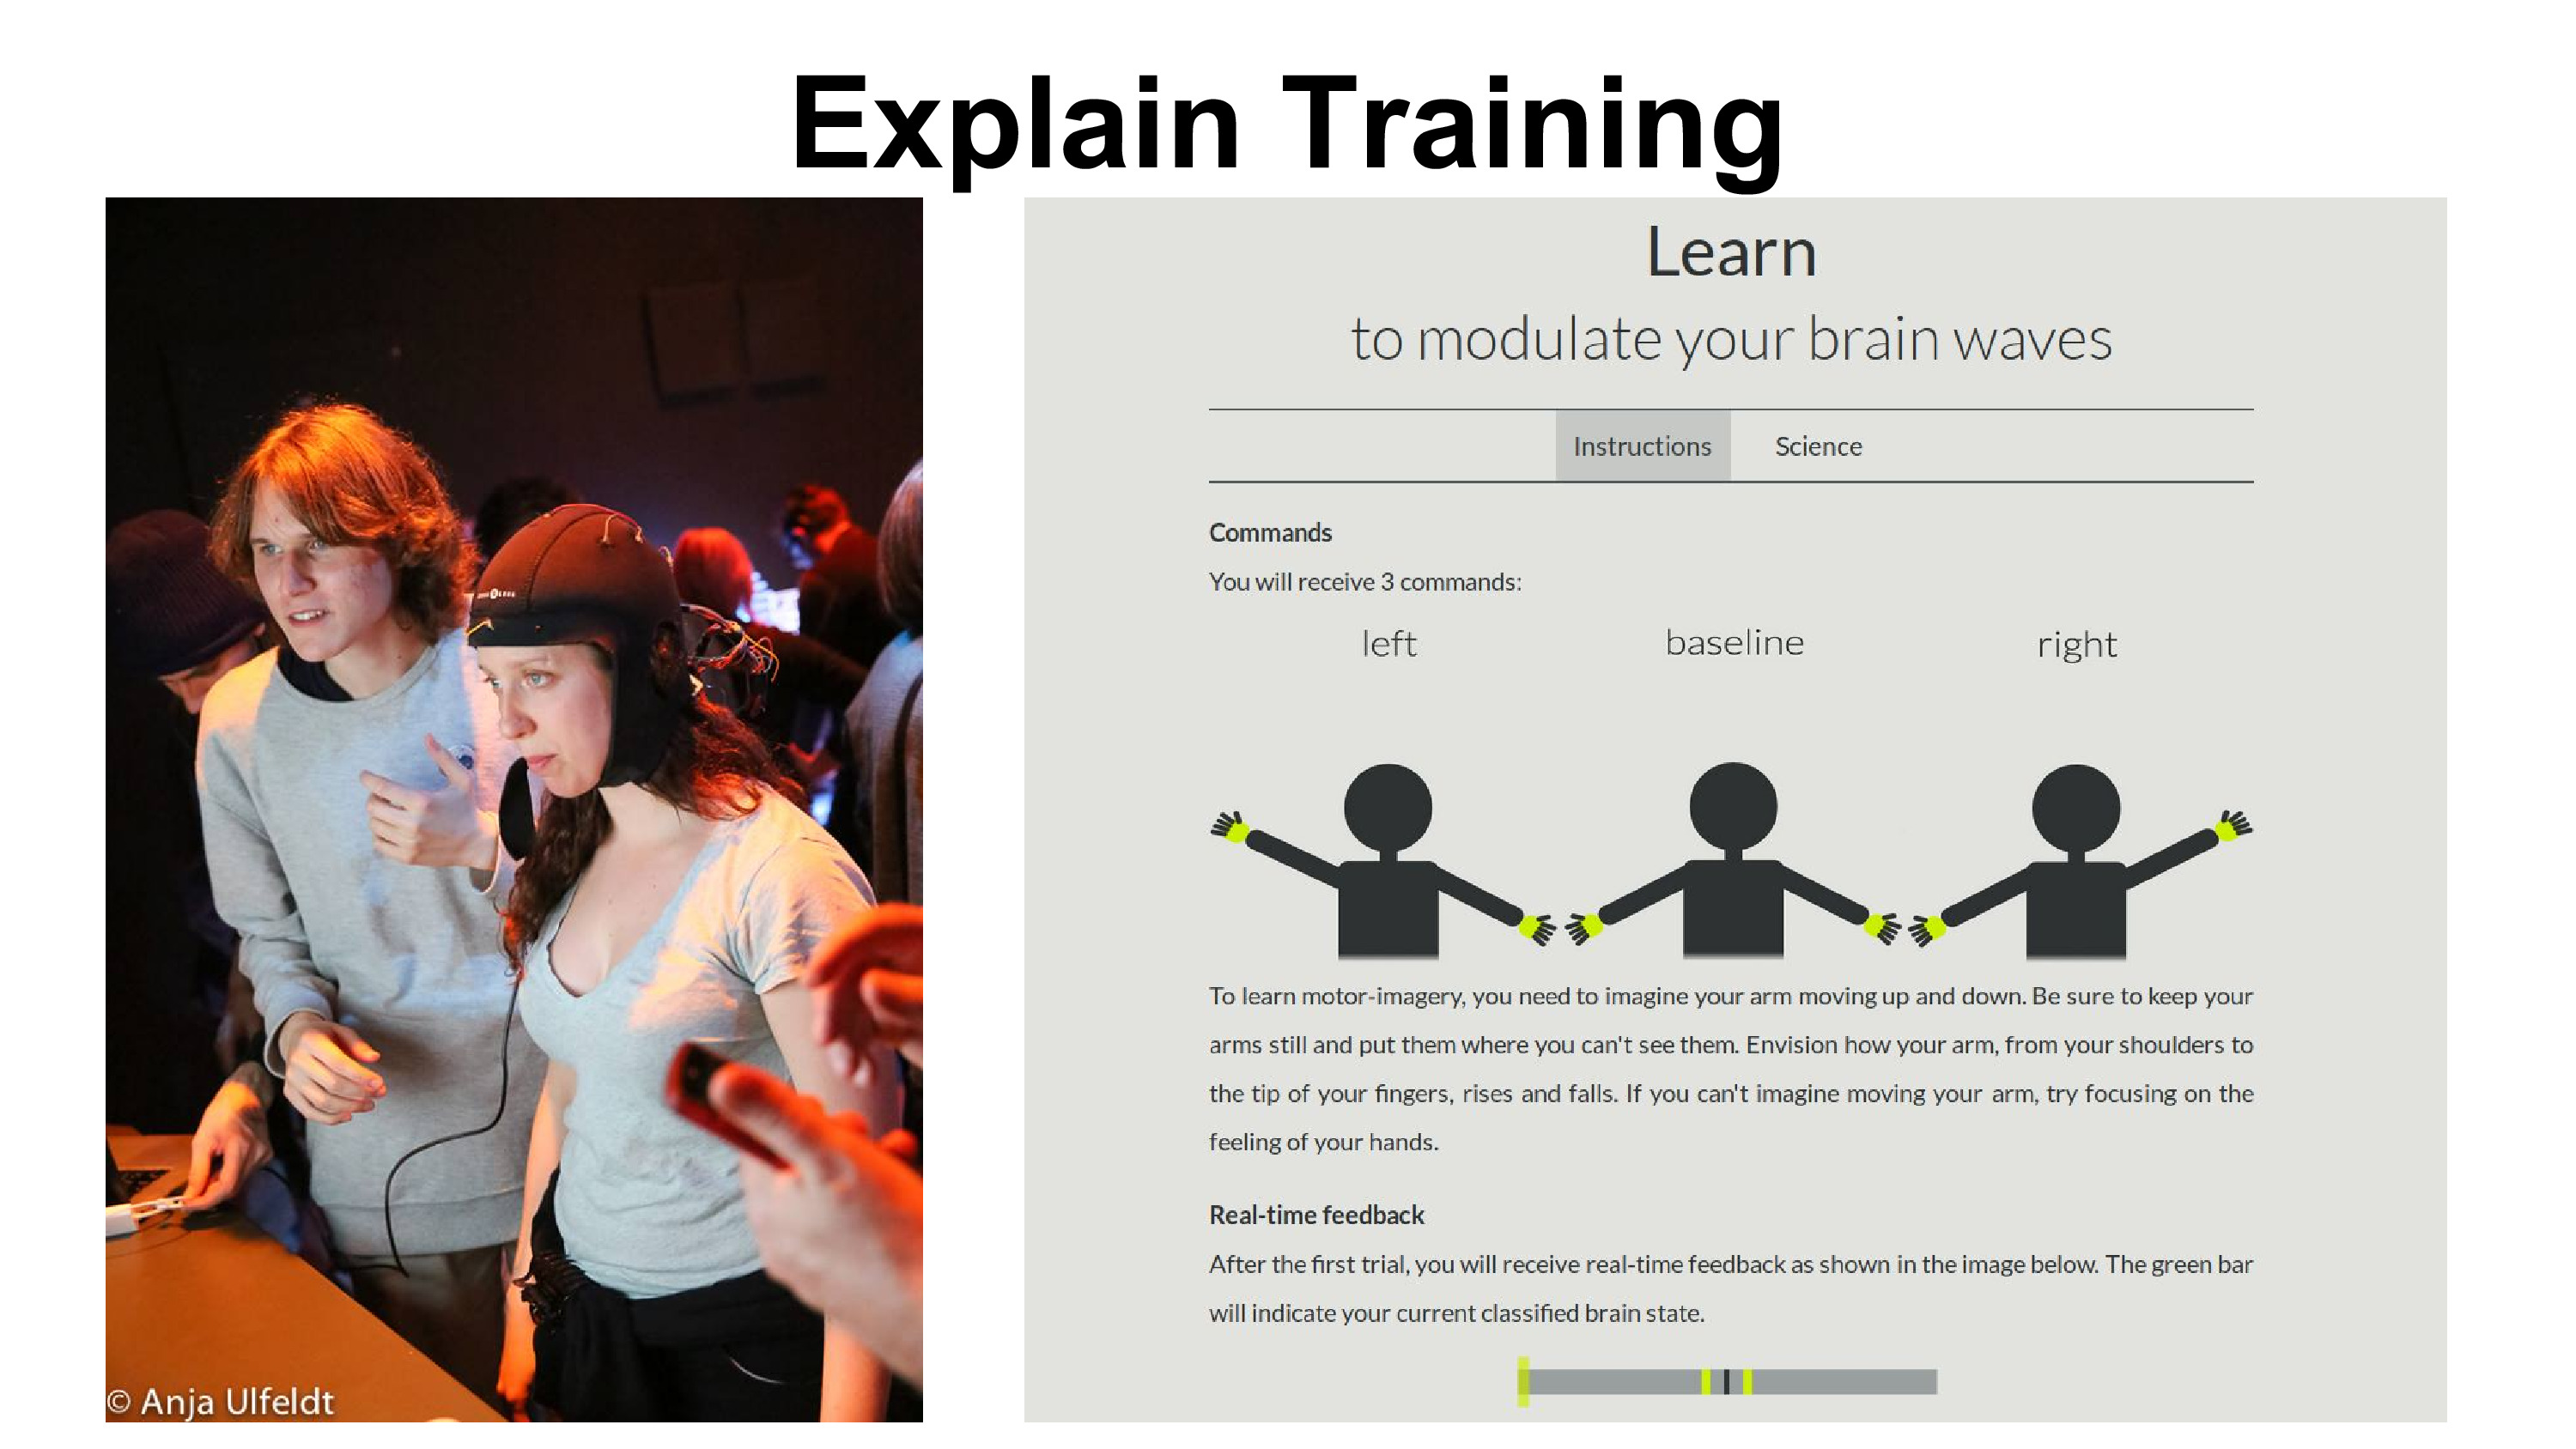
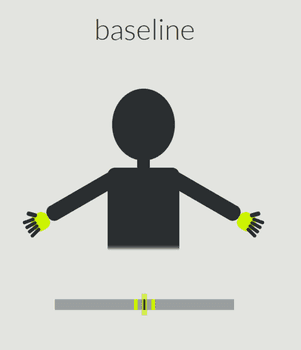
We would then explain the training protocol. Basically the visitors needed to do some motor imagery. They would see a little man waving his arm (for left or right) or staying still (for baseline). They would then have to imagine something related to their left arm, right arm, or neither, according to the position of the man.
I would tell them it's important to have "vivid and consistent images". Things like imagining sensations on hand, imagining arm wrestling, or imagining raising hand in the air all worked for different people.
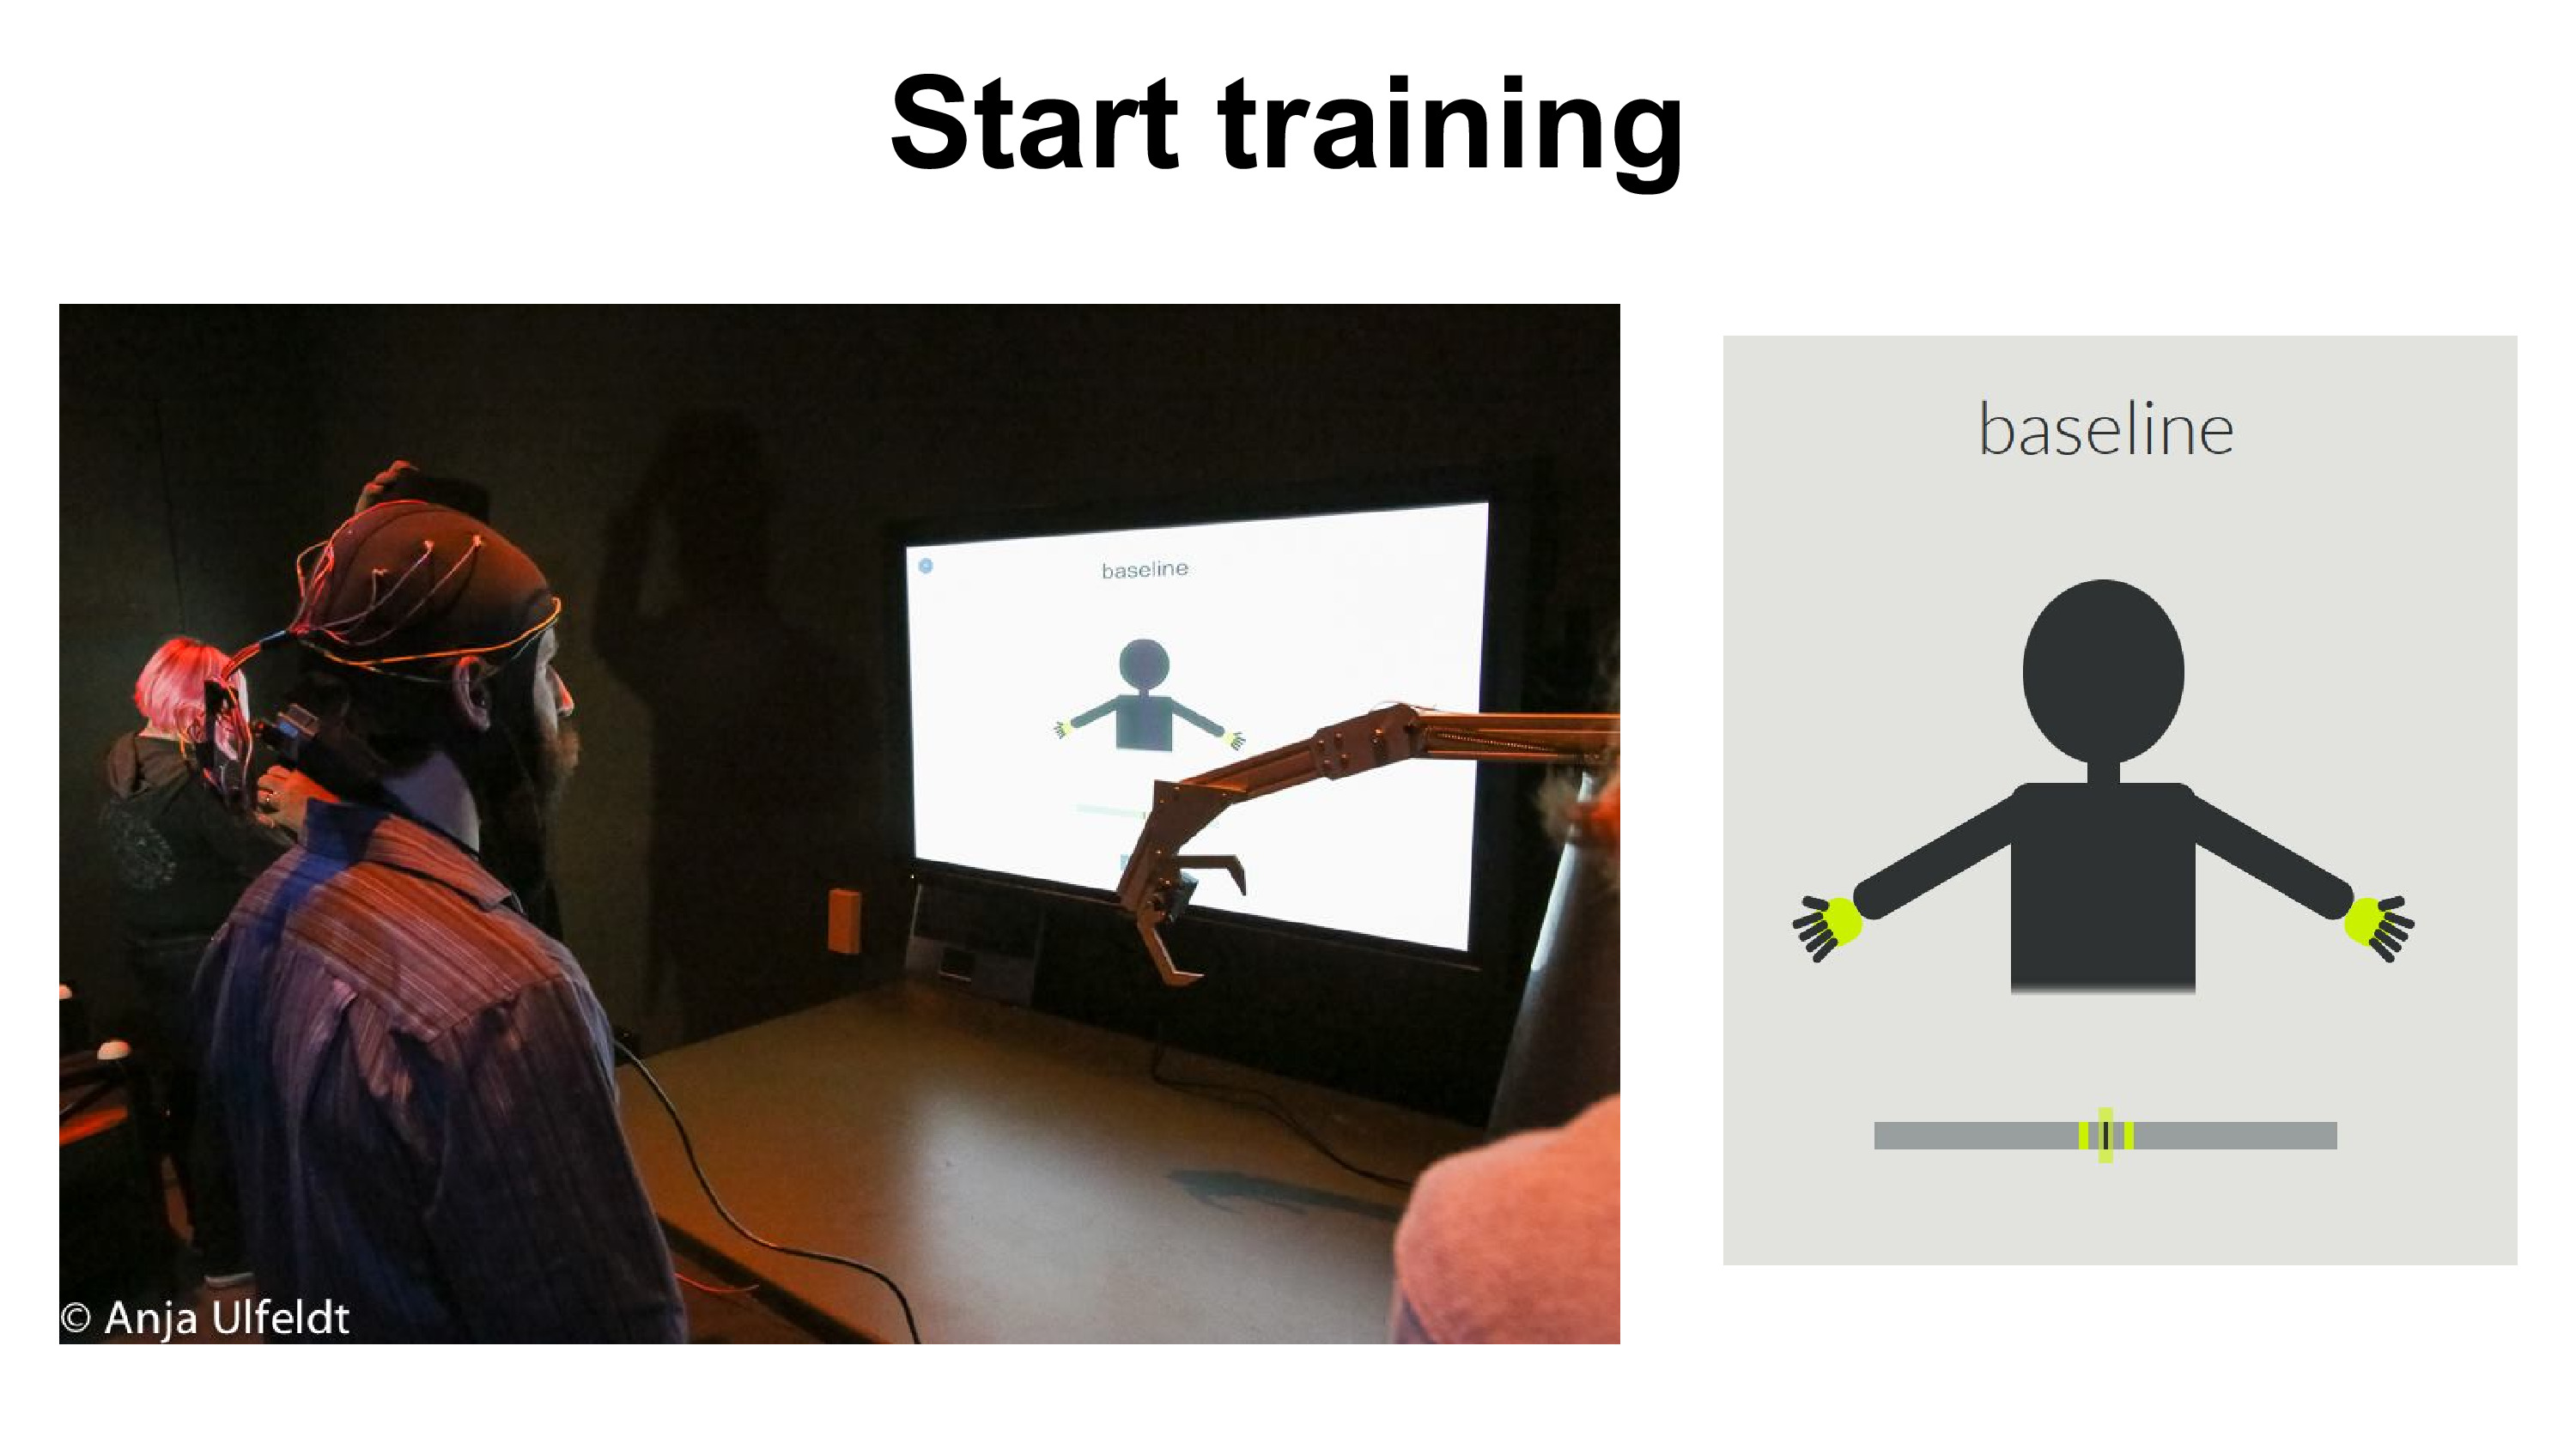
Here they actually did the training described above.
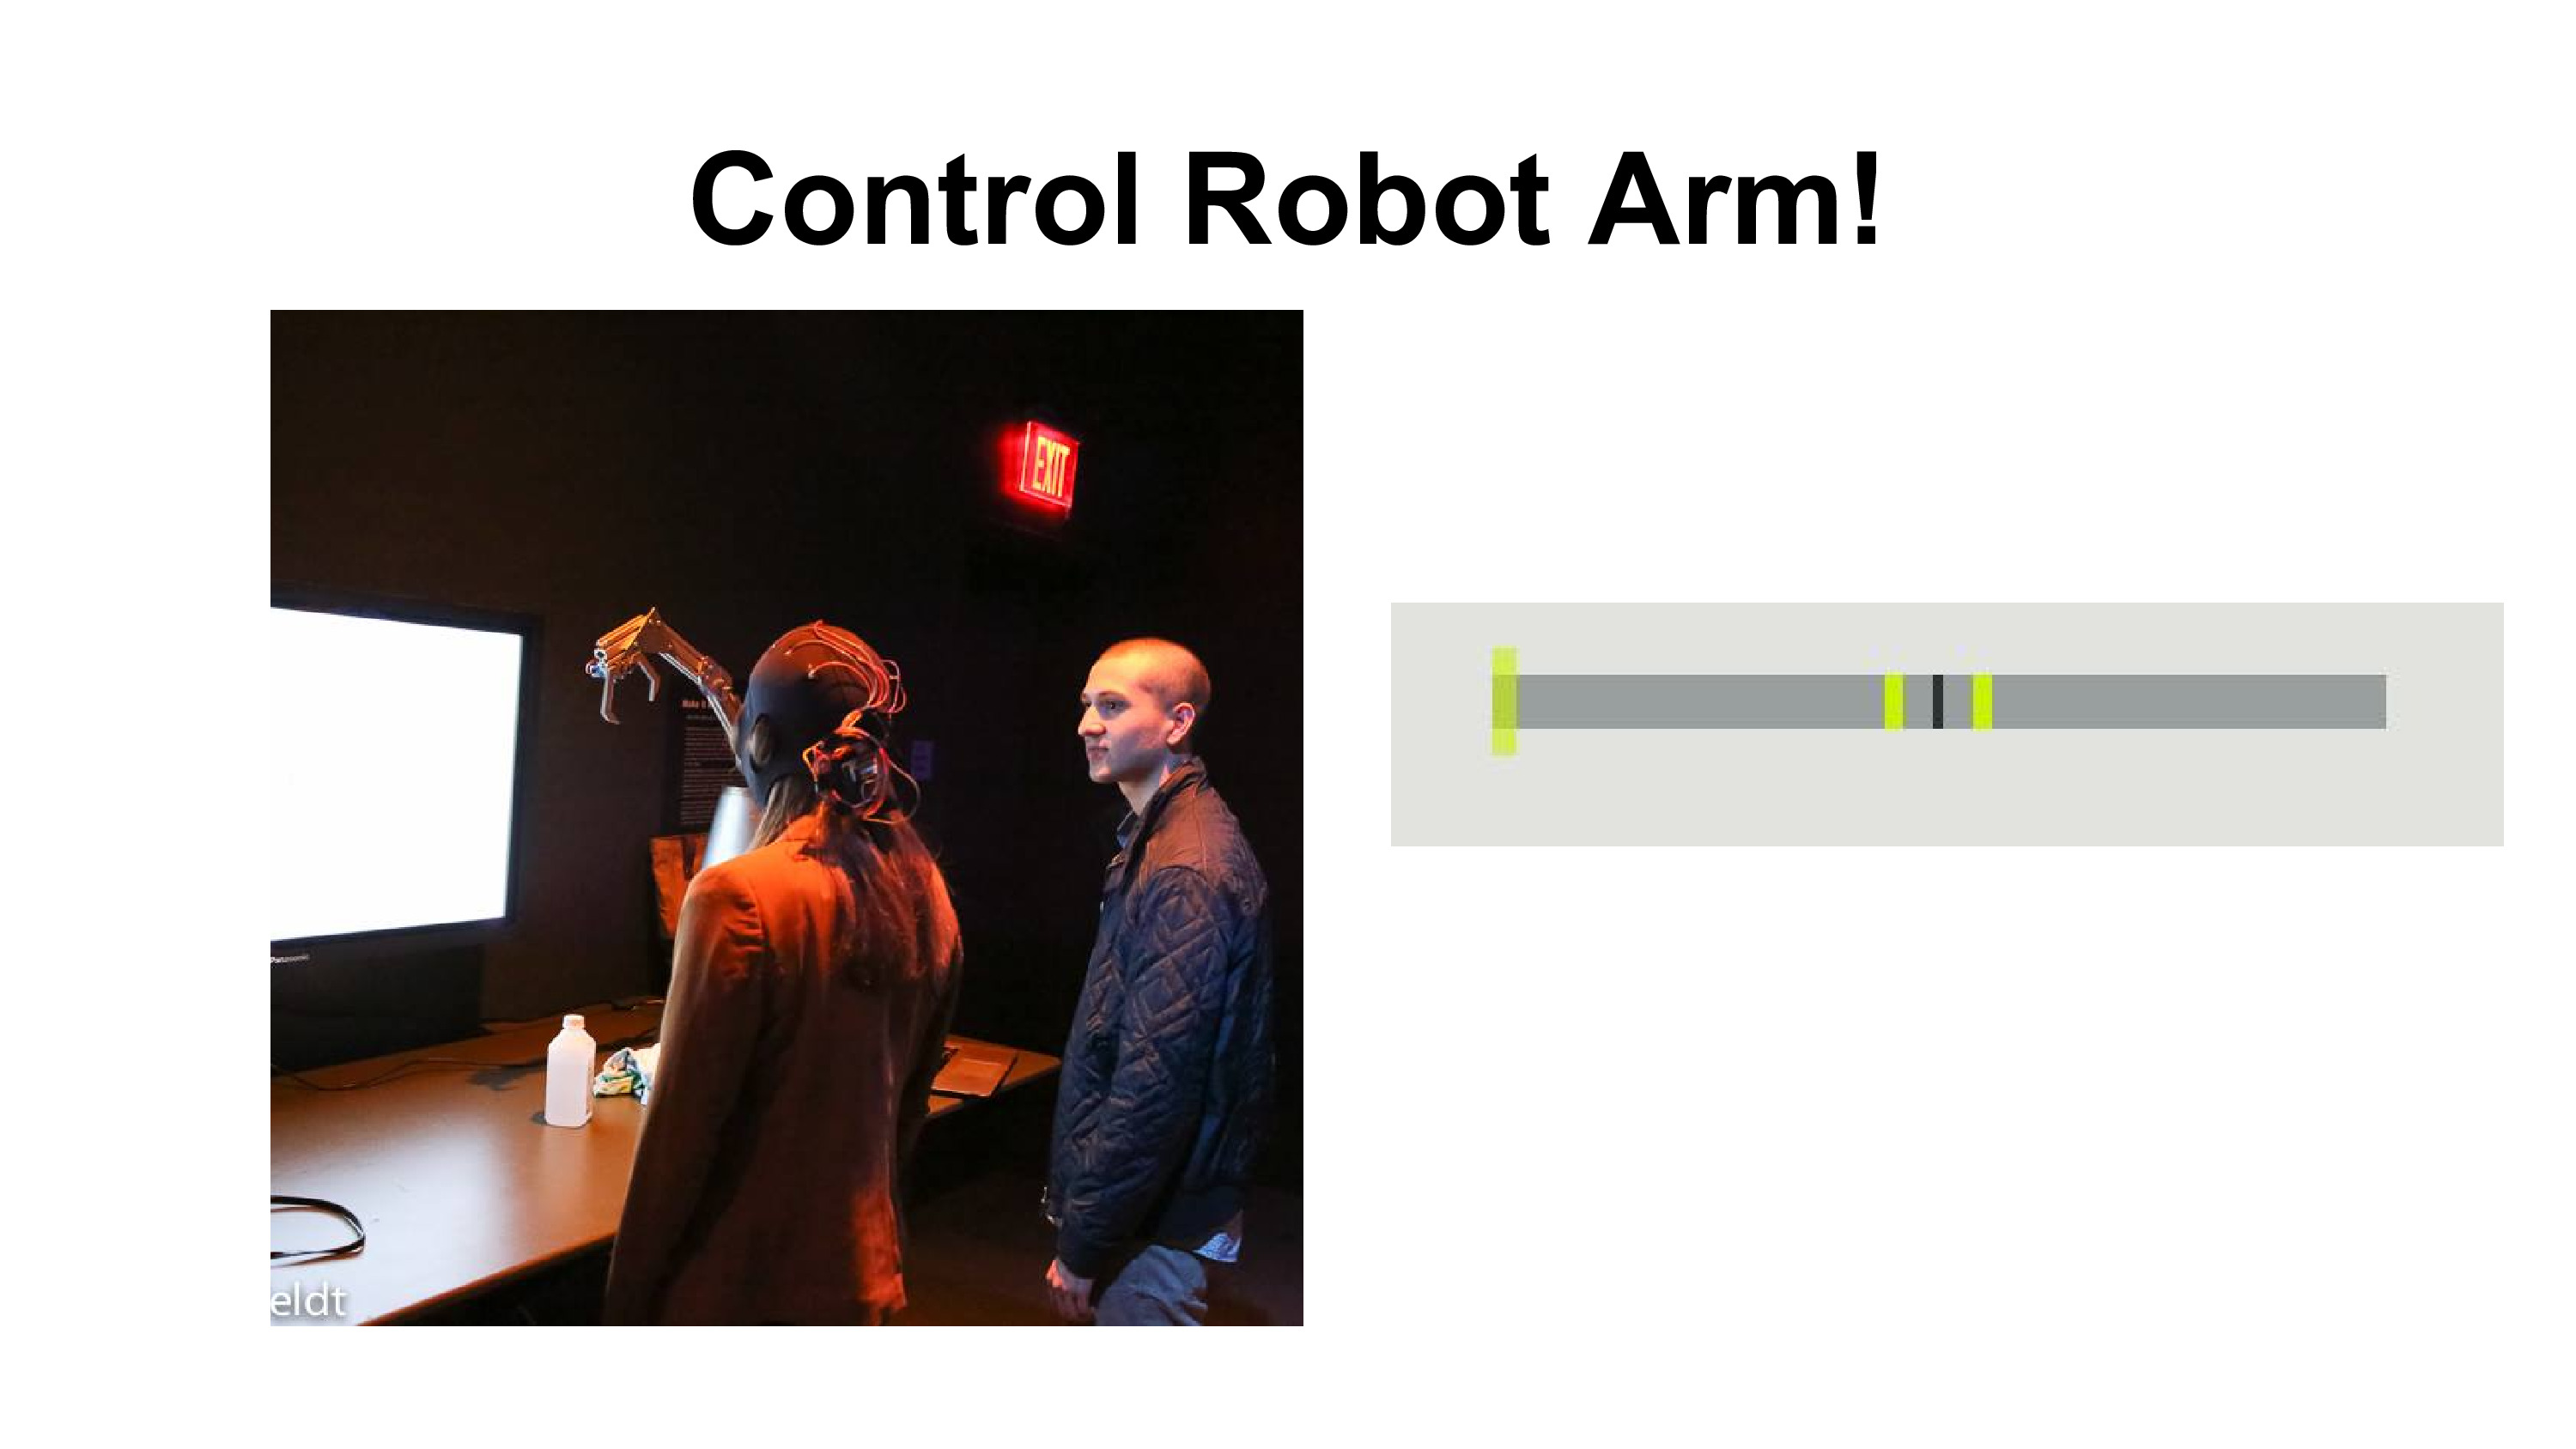
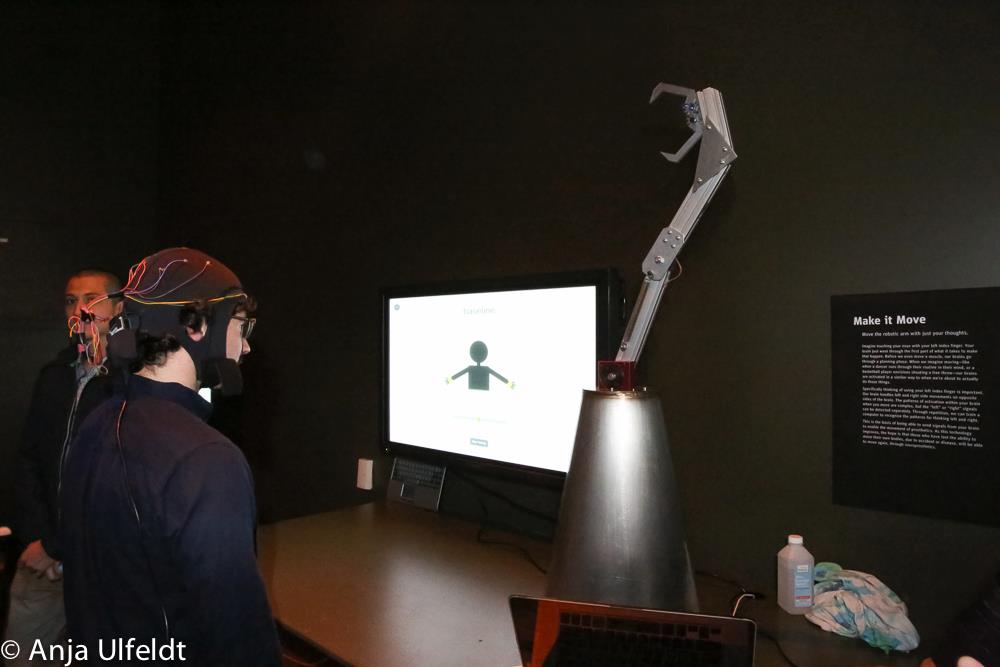
The most exciting part! They finally get to control the robot arm. It's pretty exciting when the robot arm moves according to your thoughts!
Some visitors could do it, others not so much. I noticed that the younger visitors had an easier time than the older ones.
My friend Tomás claims it's due to "BCI illiteracy", that some people have trouble learning this abstract skill, although I feel like we could all learn this skill, albeit at different paces. Our little booth had only so much time to train people, our headset perhaps not suited for everyone (especially with lots of frizzy hair), and the people themselves not always in the best state of mind to do this training.
Behind the scenes
Overview of the system
This exhibit is composed of three main components
- The headset: to record the data from the visitor
- The computer: to analyze the data and display a screen of the training to the visitor
- The robotic arm: to be controlled
I cannot speak much about the robotic arm, since I didn't build it. This was the work of Jon Ferran and Alex Nolan from m0xy. It was a pretty cool metal arm with one degree of freedom, and a claw to pinch.
All the code is available here: https://github.com/tomasero/mind-kinetics
Headset
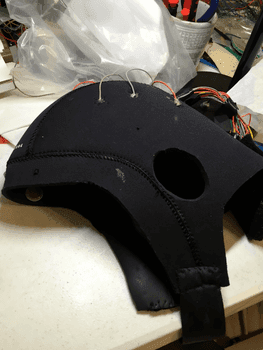
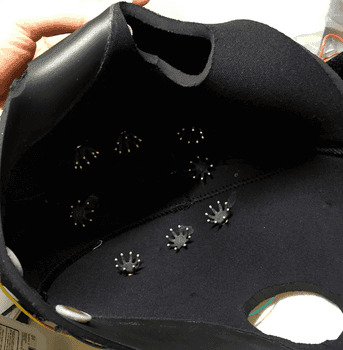
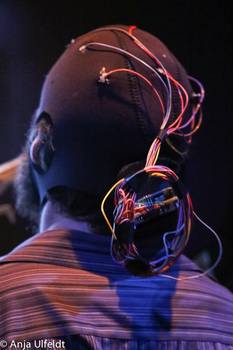
John Naulty and I built the headset. John had the great idea of using a swimsuit cap. It was flexible so that it fit tightly on most people's heads, and at the same time was easily cleanable. We sewed the electrodes onto the headset, soldered the wires onto the electrodes, and added hot glue for extra stability.
If you know some neuroscience, you might notice that we positioned the electrodes to fall roughly onto the motor cortex, as this is where we would expect the strongest signals for motor imagery.
The tight fit was necessary, as the dry Cognionics electrodes we were using (those octopus shaped things in the second picture) needed to be firmly on the person's head to get a good signal.
Being able to clean the headset turned out to be crucial as well. The Exploratorium staff gave us a hard time about the hygiene of the cap. We had to demonstrate cleaning the cap with isopropyl alcohol to finally get approval for the exhibit. During the whole exhibit, we would clean the cap repeatedly between visitors (although most did not care too much).
Streaming the data
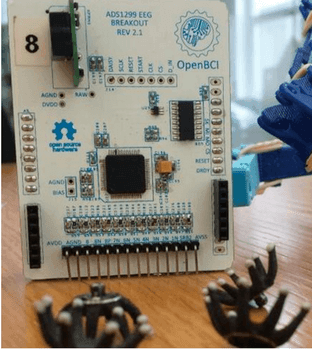
For actually collecting the data, we used the excellent OpenBCI. The V3 wireless board was not stable yet, so we used the V2 version (an Arduino shield).
We sampled the data at 250Hz, the maximum we could achieve with the OpenBCI board. It should in theory be possible to do more, but we didn't have time to investigate for the expo.
Analysis
The classifier code is here. Honestly, it's really nasty though. I leave it as a reference, but I strongly suggest anyone replicating this to rewrite the code from scratch in a cleaner way. (If I were to do it again, I would use a scikit-learn pipeline instead of the mdp one, and would clean up the code in many places.)
The pipeline is as follows:
- Raw EEG data
- Identify and remove artifacts
- Extract features
- Classify
- Smooth out results
Raw EEG
The raw EEG data is just collected from the OpenBCI using openbci.py (openbciv3.py for V3).
Identify and remove artifacts
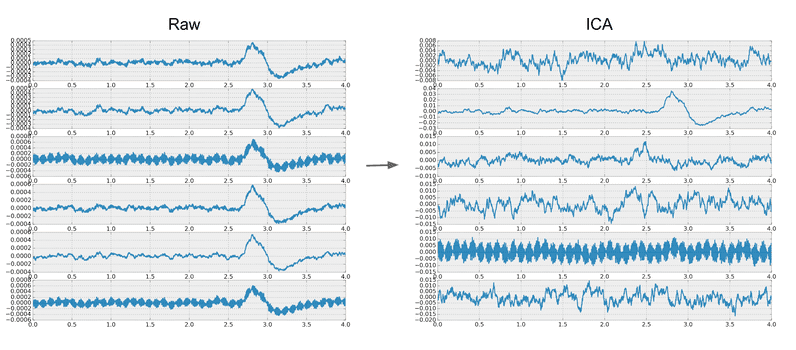
For identifying and removing artifacts we used independent components analysis (ICA). ICA is great at separating out the eye blinks in EEG. You can see the how the raw and transformed signals look. The spike around 2.5 to 3.0s is an eye blink. You can see how that gets neatly separated into 2nd ICA component below. Notice also how the 5th component identifies the 60Hz line noise.
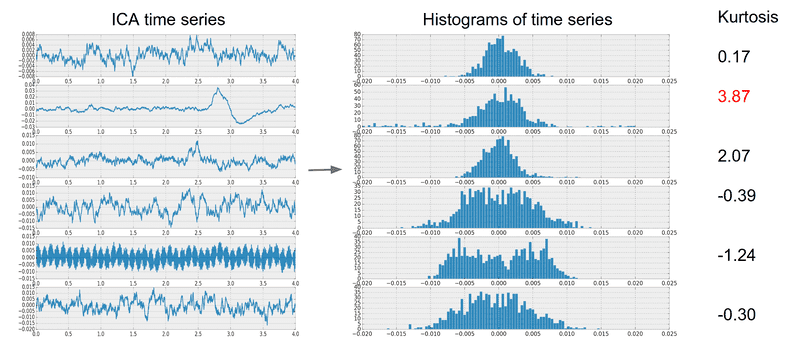
However, the eye blink component is not always the same index, so we need an automated way to identify which component represents eye blinks. It turns out we can do this by looking at the kurtosis of each component. Kurtosis, roughly, measures how much of the distribution is in the tails. You can see why this metric makes sense through the histograms below.
Because the eye blink has some smooth (and pretty high) spikes, the distribution of the values ends up having more values in the tails (check the 2nd component histogram below).
Extract features
The features extracted are relatively simple. We take a window of 256 samples (about 1 second) from each of the 8 channels, stepping by 32 samples. We multiply this window by a kaiser window with beta = 14.
Then, we take the magnitude of the Fourier transform of each window. This gives us the power of different frequencies at each point in time.
Classify
To classify, we used a K-nearest neighbors classifier, with n=1 neighbors. This is probably the weakest part of the pipeline. If I were to do this again, I would use a random forest classifier or something similar. Still, it worked alright and was very fast to train and classify.
Smooth out results
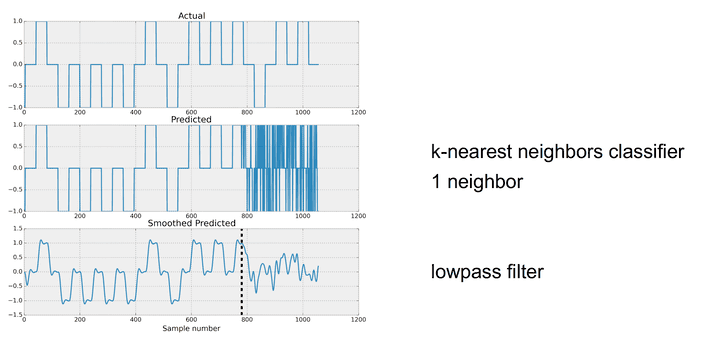
In the image above, you can see the results on some training and test data. The classifier is trained on training data on samples below ~780 (the dotted line), and tested on samples above ~780.
As you can see, the classifier varies a lot from sample to sample. So to give a more stable estimate, we apply a low-pass filter on the classified value. This is the output that we give to the arm.
Display
The final part is displaying the information through some interface. My friend Tomás Vega made a nice web interface that listened to information through a websocket (using socket.io), that my classifier could output information to.
After the classifier trained on some samples, we showed output from the classifier on future samples, to also train the user to give consistent signals.
All the web stuff is here: https://github.com/tomasero/mind-kinetics/tree/master/training
The web interface code is much cleaner than the classifier code, and potentially reusable.
That's it!
We basically put together this thing in one month of work, with another month's worth of maintenance. If this sounds crazy, that's because it is. There were countless times when I thought we would not make it, only to see the project survive miraculously over the next day.
Of course, this project would not have been possible without the other people who contributed. John Naulty made most of the headset, Tomás Vega built the interface and helped with testing, and Jon Ferran and Alex Nolan built the actual arm. I am very grateful to the Exploratorium for hosting us, and the Cognitive Technology Group (now part of NeurotechX) and m0xy for organizing this one-of-a-kind experience.